Lesson 2 :: File Formats and Tools
Ah! I see you all survived the previous lesson about the different kind of creative programs you can use to manipulate images. So let’s get on with the next lesson. In this lesson we will be covering the different kind of tools a creative program has and what to use them for. Beside that we will be covering the different formats there are. From GIF to PSD formats.
File formats
There are a lot of different file formats, more than one uses or you want to know. In the first lesson I mentioned the native file formats of GIMP, PaintShop Pro and Photoshop. Those were XCF, PSD and PSP. But beside those there are more file formats. The ones you will mostly be using are GIF, JPEG and PNG. Some of you will know these file formats. But what is the difference between these three file formats.
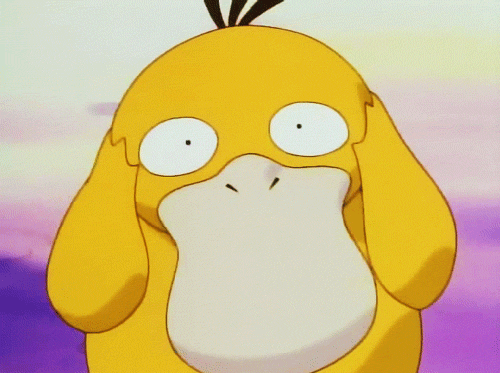 Animated GIF |
GIF
GIF stands for Graphics Interchange Format, which is a bitmap image format that was introduced by CompuServe in 1987. GIF has a wide support and is known for its portability. GIF supports up to 8 bits per pixel for each image. This will allow a single image to reference its own palette of up to 256 different colors. The GIF format also allows you to supports animations and allows a separate palette of up to 256 colors for each frame. Usages of GIF
|
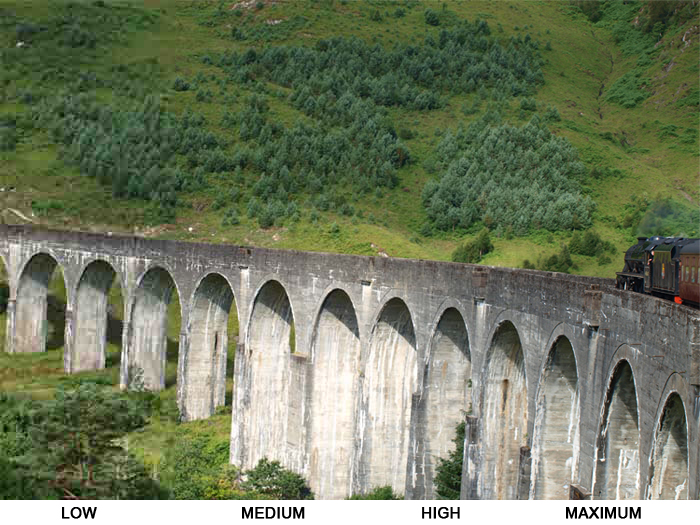 The lossy compressions of JPEG
(click for a larger version)
The lossy compressions of JPEG
(click for a larger version)
JPEG
JPEG is a named after its creator the Joint Photographic Expert Group. JPEG is also often seen as a JPG file. These two are the same, but JPG is just a little bit shorter. JPEG is a commonly used method of lossy compression for digital photography. This is because the degree of compression can be adusted, allowing a selectable tradeoff between storage size and image quality. JPEG typically achieves 10:1 compression with little perceptible loss in image quality. JPEG is a format that is often used in digital photography. JPEG is also one of the most common format for storing and transmitting photographic images on the internet.
Usages of JPEG
- JPEG is best used on photographs and paintings of realistic scenes with smooth variations of tone and color
- JPEG is used when the amount of data for an image is important. JPEG lossy compression method comes in use to reduce or increase the image fidelity.
- It’s not wise to use JPEG when you want to save line drawings and other textual or iconic graphics, where the sharp contrasts between adjacent pixels can cause noticeable artifacts.
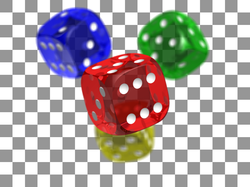 Transparency with PNG
PNG
The last format we will cover is PNG. PNG stands for Portable Network Graphics. PNG is a raster graphics file format that supports lossless data compression. PNG was created as an improved, non-patented replacement for GIF. At this moment PNG is the most used lossless image compression format on the internet. Because PNG is developed for lossless data compression it’s not suitable for saving photographs. Unlike GIF, PNG can’t be used for animation and low-resolution film clips.
Usages of PNG
- PNG is suitable for sharp-edged line art.
- PNG is suitable for transparency.
- PNG supports palette-based images (with palettes of 24-bit RGB or 32-bit RGBA colors)
- PNG isn’t used to save animation or digital photography.
Tools
Before we go to really manipulating images, you also need to know what tools a creative program has and where you can use them for. We will now be covering the most used and basic tools there are. The tools that we will be covering are those that fall under selection, drawing, painting, typing and retouching.
Selection tools
There are five selection tools that you should know. These are the Rectangular Marquee, Elliptical Marquee, Lasso, Magic Wand and Pen Tool. We will be discussing each of these now. Beside that I will also say how GIMP names them. Just to make things easier for you guys.
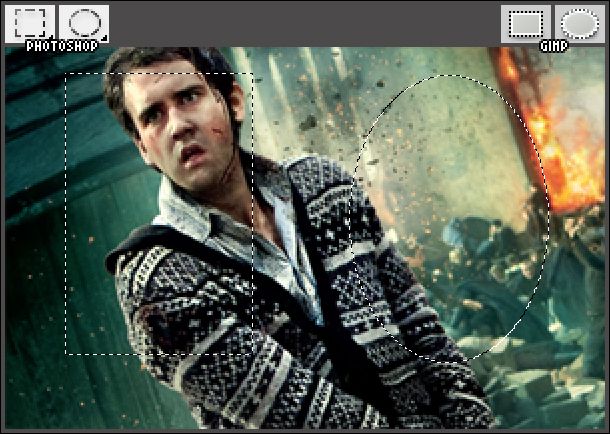
Rectangular and Elliptical Marquee
The Rectangular Marquee is also known as the Rectangle Select in GIMP. This tool is used for selecting rectangular regions in an image. The Elliptical Marquee is known as the Ellipse Tool in GIMP. With the Elliptical Marquee you can select elliptical regions in an image. You initiate a selection with a Marquee by clicking and dragging in the image window. The selection is completed by releasing the mouse button.
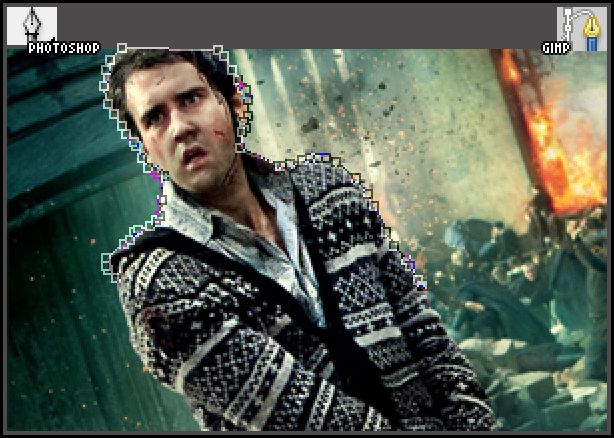
 Lasso
Lasso
The Lasso is a tool that exist in Photoshop out of three versions. You have the Regular, Polygonal and Magnetic Lasso’s. I will only go into the Regular Lasso, because if you would use any of these it would mostly be the Regular Lasso. Beside that the GIMP version doesn’t have the Polygonal Lasso. It does have the Magnetic Lasso, which is called the Intelligent Scissors. But let me go on with the Regular Lasso. The Regular Lasso is called Free-Hand Selection Tool. The Lasso is used to draw free-hand selections. You can initiate selections with this tool by clicking on the image. You then can draw around the part of the image you want to select. You will have to hold your mouse until you are finished. If you let go of your mouse to early, your selection won’t be complete.
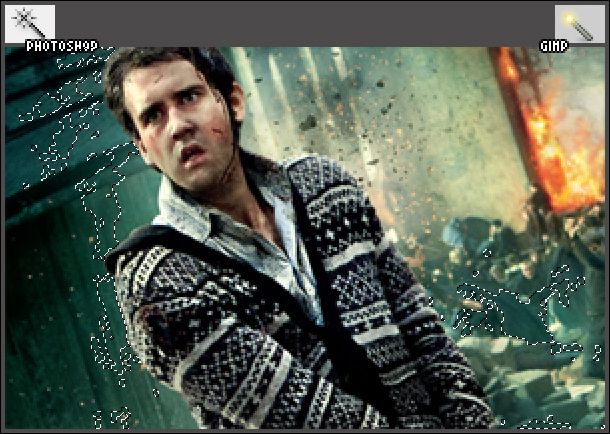
Magic Wand
When is a wand not magic? So yes even with a Creative Program we have an amazing Magic Wand! The Magic Wand is also called Magic Wand in GIMP. The Magic Wand tool let you select areas based on pixels. You will only need to click once. Then the Magic Wand will detect pixels that are very similar to each other. When you need more than a few clicks, you will need to switch to another selection tool.
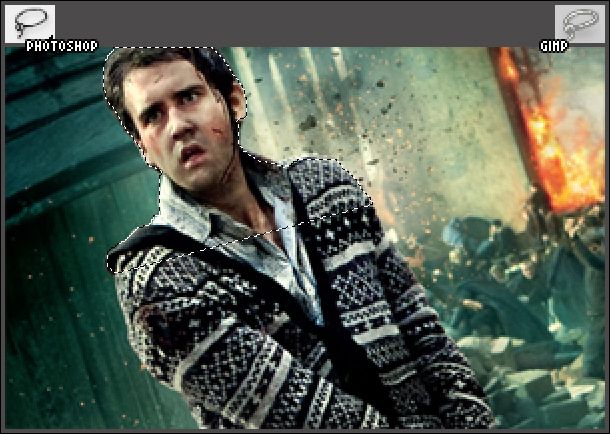
Pen Tool
The Pen Tool is called the Bezier Path in GIMP. With the Pen Tool one can create precise paths that you can manipulate by using the anchor points. The Pen Tool does the same as the Lasso, but instead of the Lasso you can let go of your mouse button during your selection. And like I said you can change the selection to match your image better. This way you can also make curved borders with when making the selection. You can do this until your final result fits your desired selection.
Rectangular and Elliptical Marquee
The Rectangular Marquee is also known as the Rectangle Select in GIMP. This tool is used for selecting rectangular regions in an image. The Elliptical Marquee is known as the Ellipse Tool in GIMP. With the Elliptical Marquee you can select elliptical regions in an image. You initiate a selection with a Marquee by clicking and dragging in the image window. The selection is completed by releasing the mouse button.
LassoThe Lasso is a tool that exist in Photoshop out of three versions. You have the Regular, Polygonal and Magnetic Lasso’s. I will only go into the Regular Lasso, because if you would use any of these it would mostly be the Regular Lasso. Beside that the GIMP version doesn’t have the Polygonal Lasso. It does have the Magnetic Lasso, which is called the Intelligent Scissors. But let me go on with the Regular Lasso. The Regular Lasso is called Free-Hand Selection Tool. The Lasso is used to draw free-hand selections. You can initiate selections with this tool by clicking on the image. You then can draw around the part of the image you want to select. You will have to hold your mouse until you are finished. If you let go of your mouse to early, your selection won’t be complete.
Magic Wand
When is a wand not magic? So yes even with a Creative Program we have an amazing Magic Wand! The Magic Wand is also called Magic Wand in GIMP. The Magic Wand tool let you select areas based on pixels. You will only need to click once. Then the Magic Wand will detect pixels that are very similar to each other. When you need more than a few clicks, you will need to switch to another selection tool.
Pen Tool
The Pen Tool is called the Bezier Path in GIMP. With the Pen Tool one can create precise paths that you can manipulate by using the anchor points. The Pen Tool does the same as the Lasso, but instead of the Lasso you can let go of your mouse button during your selection. And like I said you can change the selection to match your image better. This way you can also make curved borders with when making the selection. You can do this until your final result fits your desired selection.
Drawing/Painting tools
The Drawing/Painting Tools, are those that you use to draw or paint the area or selection of the area. It always up to you how you want to use this. We have several tools for this.
 Eraser
The Eraser is a tool what it does after its name. It erases areas. With it you can erase mistakes, but you can also use it as a selection tool. You can erase the background of the image. The border of th rest of your image will have transparancy. This transparancy can let your image blend in with the rest of your grpahic.
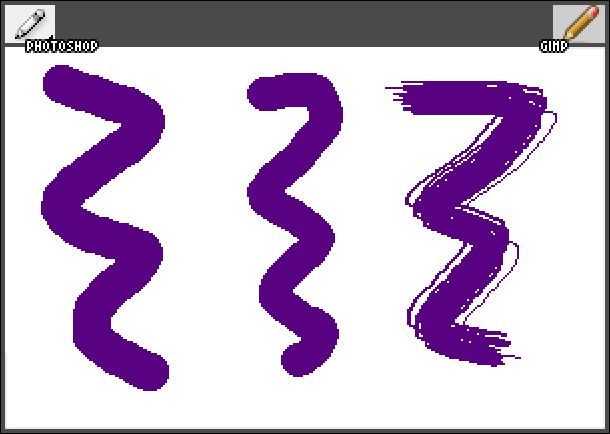
Pencil Tool
The Pencil Tool is named the same in GIMP. With the Pencil Tool you can draw hard edged lines, or ‘pixelated’ lines. It’s one of the basic tools there are. Most of the time this is a tool that one hardly uses.
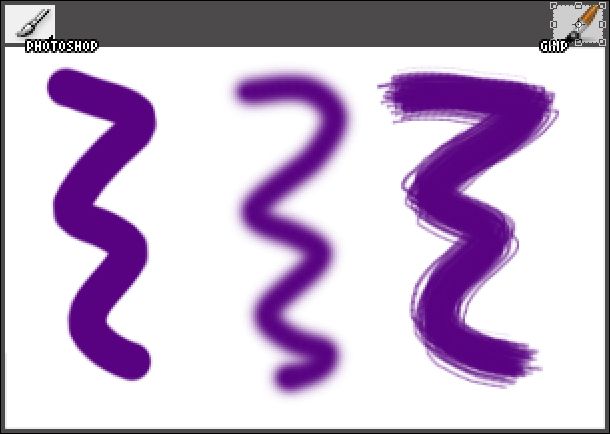
Brush Tool
The Brush Tool is named as the Paint Brush Tool in GIMP. It’s pretty obvious what this tool does. It lets you paint areas with a smooth border around it. you can adjust the hardness of the brush to your expectations.
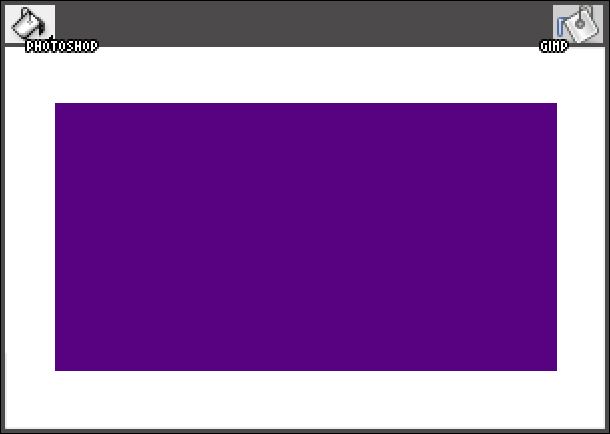
Paint Bucket Tool
The Paint Bucket Tool is called the Bucket Fill Tool in GIMP. With the Bucket Tool you can color large areas in one color in a short amount of time. While the Pencil and Brush let you have to ‘brush’ your way through the area, with the bucket you just click on the area and it turns into the color you have selected. Really handy when you have to color large areas in your graphic.
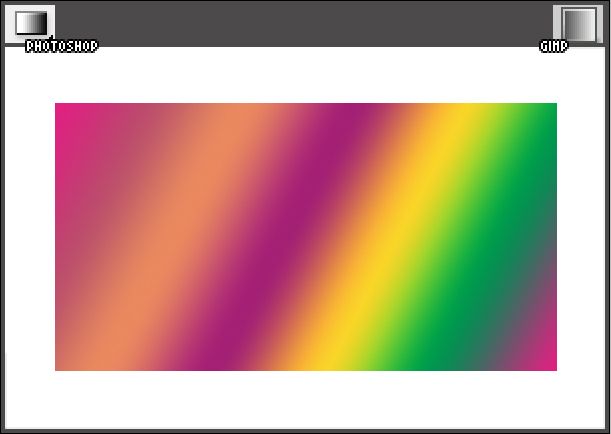
Gradient Tool
Gradient Tool known as the Blend Tool in GIMP, is a tool that allows the user to put a gradient on the image. In this cause a gradient is a blend of different colors. This can be 2 colors but also more colors like the rainbow or colors that turn transparent.
EraserThe Eraser is a tool what it does after its name. It erases areas. With it you can erase mistakes, but you can also use it as a selection tool. You can erase the background of the image. The border of th rest of your image will have transparancy. This transparancy can let your image blend in with the rest of your grpahic.
Pencil Tool
The Pencil Tool is named the same in GIMP. With the Pencil Tool you can draw hard edged lines, or ‘pixelated’ lines. It’s one of the basic tools there are. Most of the time this is a tool that one hardly uses.
Brush Tool
The Brush Tool is named as the Paint Brush Tool in GIMP. It’s pretty obvious what this tool does. It lets you paint areas with a smooth border around it. you can adjust the hardness of the brush to your expectations.
Paint Bucket Tool
The Paint Bucket Tool is called the Bucket Fill Tool in GIMP. With the Bucket Tool you can color large areas in one color in a short amount of time. While the Pencil and Brush let you have to ‘brush’ your way through the area, with the bucket you just click on the area and it turns into the color you have selected. Really handy when you have to color large areas in your graphic.
Gradient Tool
Gradient Tool known as the Blend Tool in GIMP, is a tool that allows the user to put a gradient on the image. In this cause a gradient is a blend of different colors. This can be 2 colors but also more colors like the rainbow or colors that turn transparent.
Retouching tools
Retouching is a way to manipulate and adjust photo’s. Tools for retouching are Blur, Sharpen, Smudge, Burn and Dodge. These tools are pretty easy to understand and I won’t be individually explaining what these tools do, like I did with the previous tools.
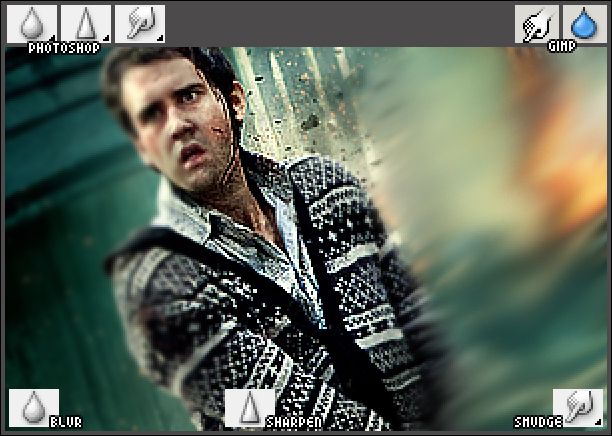
Blur, Sharpen & Smudge
The Blur Tool is used to soften portions of an image by lowering the amount of detail within the adjusted area. If you understand this function of the Blur Tool, you can probably know what the Sharpen Tool does. The Sharpen Tool has it opposite function of the Blur Tool. With the Sharpen Tool your increasing the amount of detail within the adjusted area. In the image you will see that GIMP doesn't have a seperated image for Blur or Sharpen.
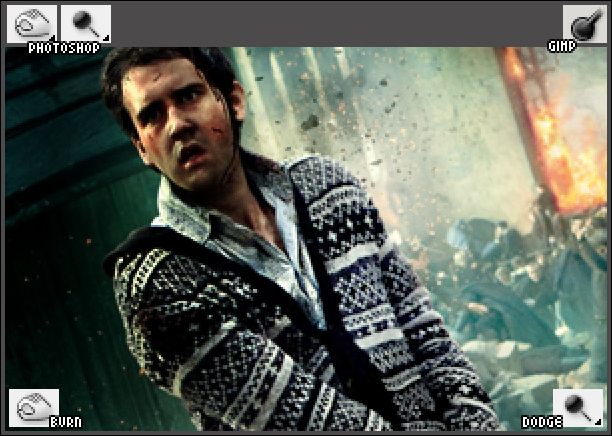
Burn and Dodge
The Burn and Dodge Tools, which are derived from traditional methods of adjusting the exposure on printed photos, have opposite effects. The Burn Tool darkens selected areas, while the Dodge Tool lightens them. As you will notice in the image, GIMP doesn't have an icon that seperates Burn from Dodge.
Blur, Sharpen & Smudge
The Blur Tool is used to soften portions of an image by lowering the amount of detail within the adjusted area. If you understand this function of the Blur Tool, you can probably know what the Sharpen Tool does. The Sharpen Tool has it opposite function of the Blur Tool. With the Sharpen Tool your increasing the amount of detail within the adjusted area. In the image you will see that GIMP doesn't have a seperated image for Blur or Sharpen.
Burn and Dodge
The Burn and Dodge Tools, which are derived from traditional methods of adjusting the exposure on printed photos, have opposite effects. The Burn Tool darkens selected areas, while the Dodge Tool lightens them. As you will notice in the image, GIMP doesn't have an icon that seperates Burn from Dodge.
Typing tool
 The last tool we are discussing is the Typing Tool. This is a quite obvious tool to spot, because this Tool’s icon is almost always a T. The obvious thing you guys do with the Typing Tool is type the text that you want on your graphic. With Photobucket you can also choose for the option of vertical typing or Mask typing. Mask typing means that you type your text but it ends up as a selection instead that it has a color.
That was everything for this lesson! Now you guys know the basics Tools. In the next lesson we will finally start with how to edit images. I will let you guys know about layers and other things.
Also if you thought that all the example images are too small, just click them then you will see the enlarged version of the examples.
Also if you thought that all the example images are too small, just click them then you will see the enlarged version of the examples.
